
Integration crafted and curated by Pratik Naik & Jonny Edward
In this insightful creative exposé. Bruce Moyle breaks down his shoot for client Clare Dornauf’s entry into Australian Hair Industry Awards, from pre-production through post-production. We thoroughly enjoyed learning about how Bruce approaches and executes projects of this magnitude!
You can see more of Bruce’s lovely work on his website. Also, be sure to follow him on Instagram!
The Brief
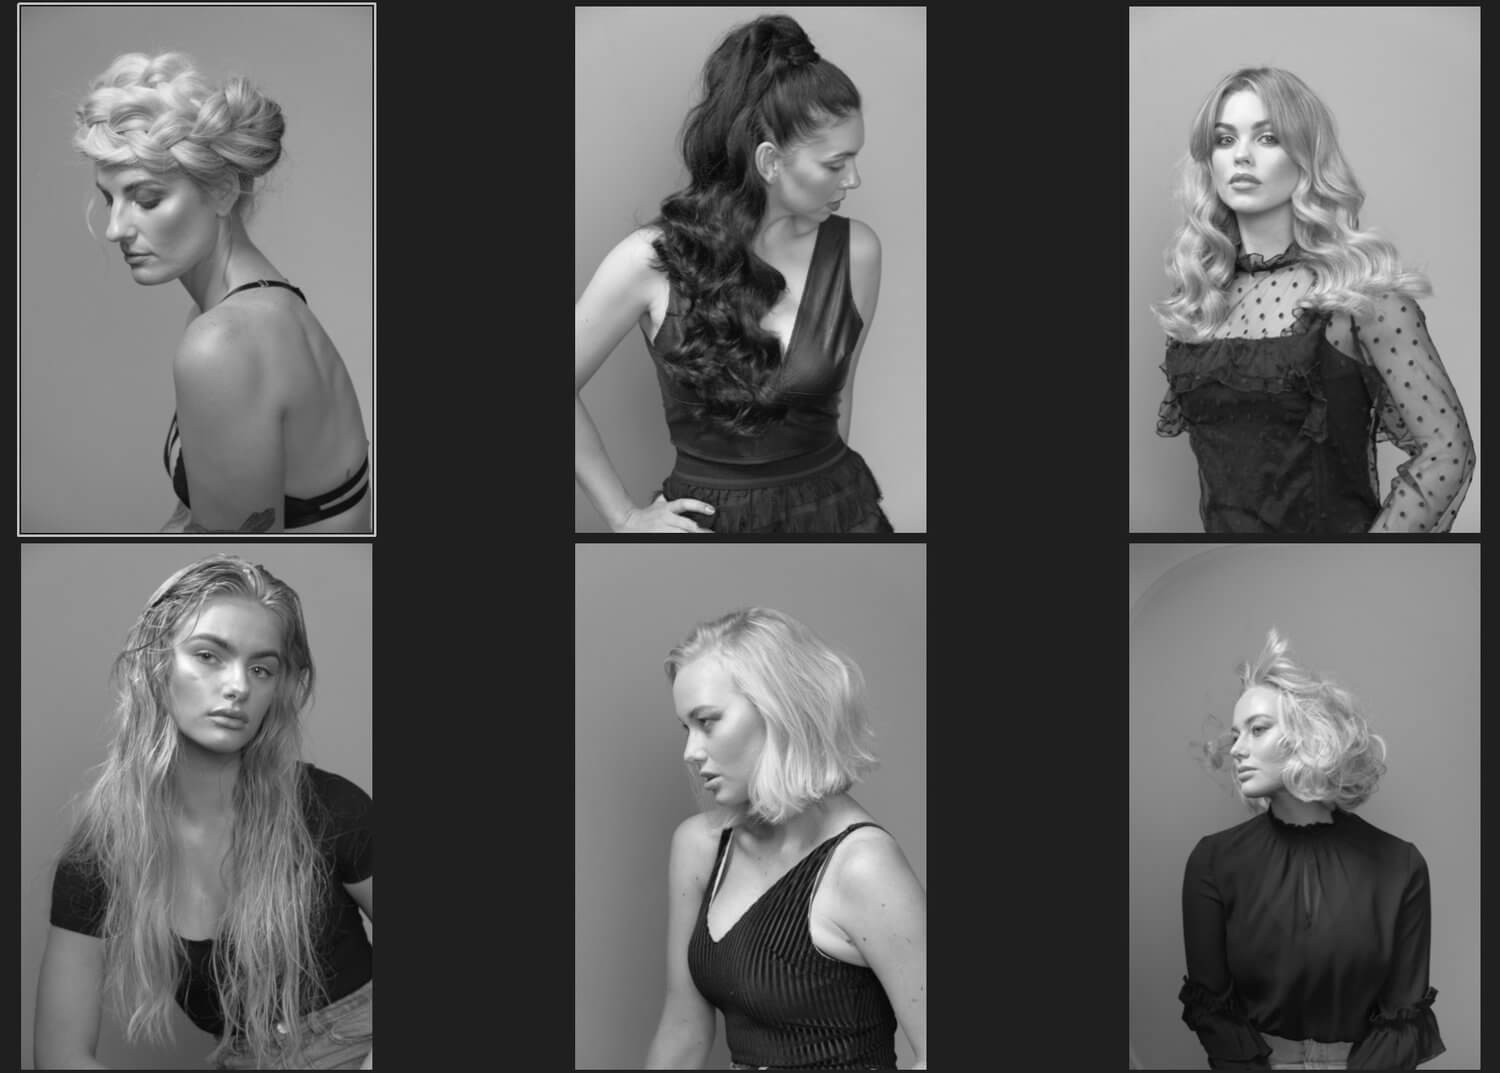
Create 6 striking hair images for Hair Stylist Clare Dornauf’s entry into Australian Hair Industry Awards.
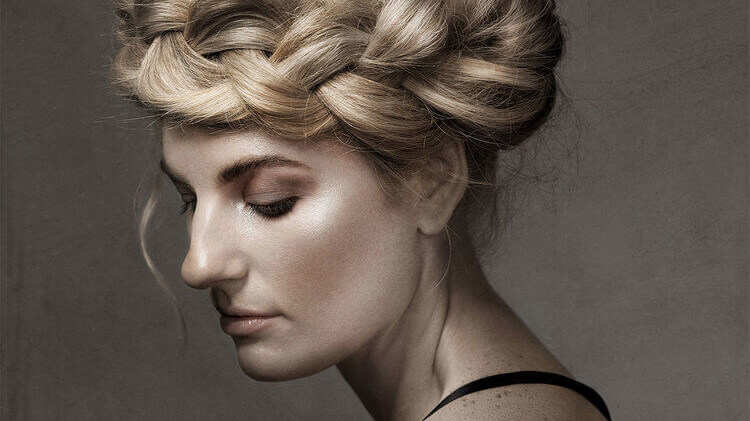
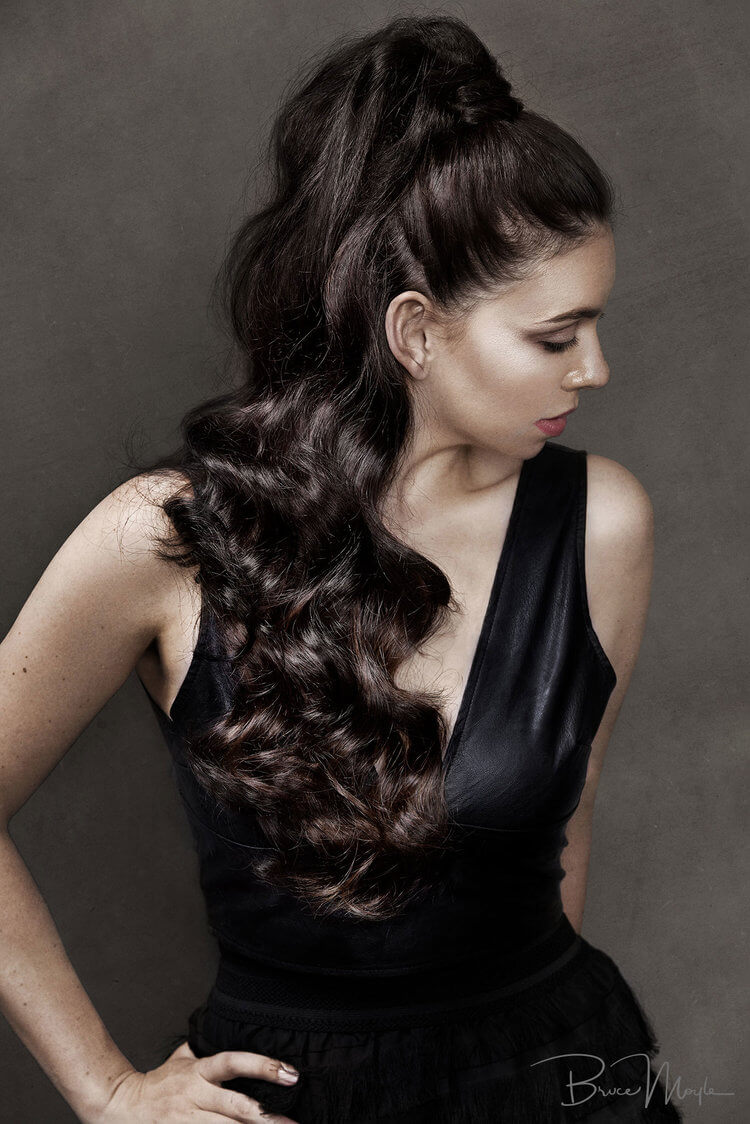
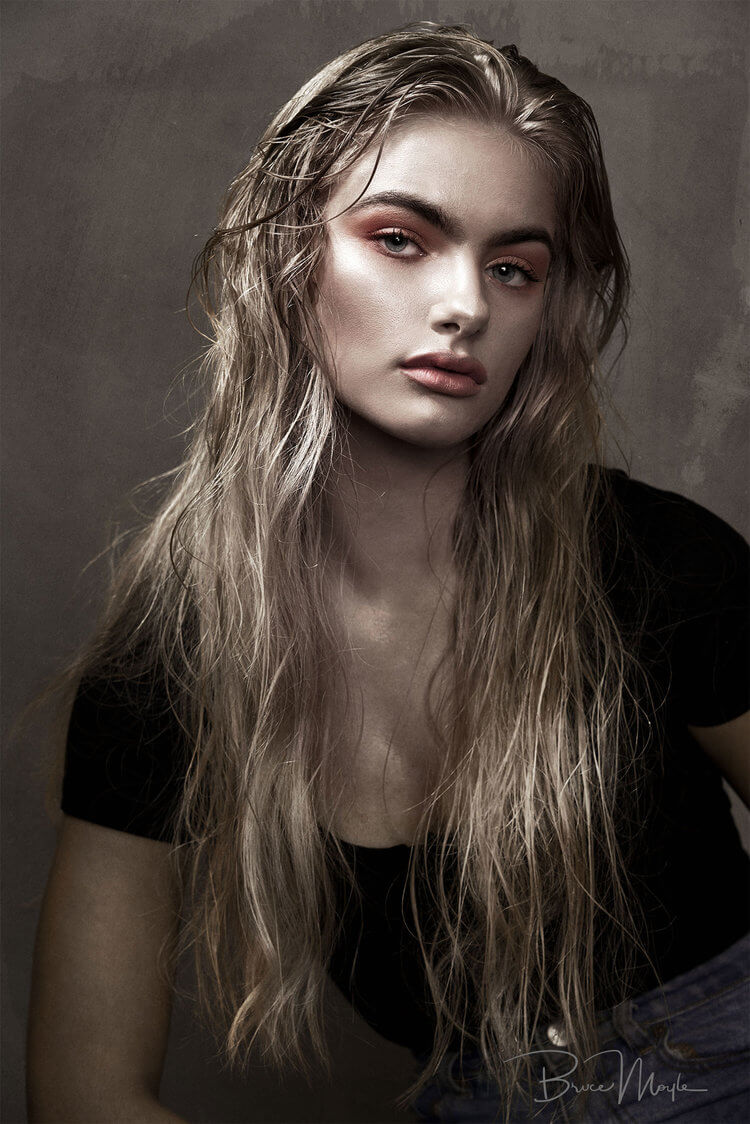
Clare sent me a bunch of different styles and mood images which featured either black and white or heavily desaturated tones. Initially, we settled on a black and white look for the shoot. High contrast & full of detail. The key here wasn’t the models so much but their hair needed to stand out.

Pre-production
I always try to do location reccie if possible. This shoot was going to be held at Convict Cutters salon. They have had a makeshift studio for years which is generally a storage space. It’s small, cramped and full of all kinds of things with only a small amount of natural light and no access to power (the boxes around the room block the points). Not doing a reccie would have potentially made the shoot very hard, if not impossible. Planning in your head is one thing, knowing what you will run into is another. As they say “forewarned, is forearmed.” With this knowledge, I can build lighting and set plan to make the shoot go smoothly.
From there I sketch the basic layout and plan my kit accordingly.
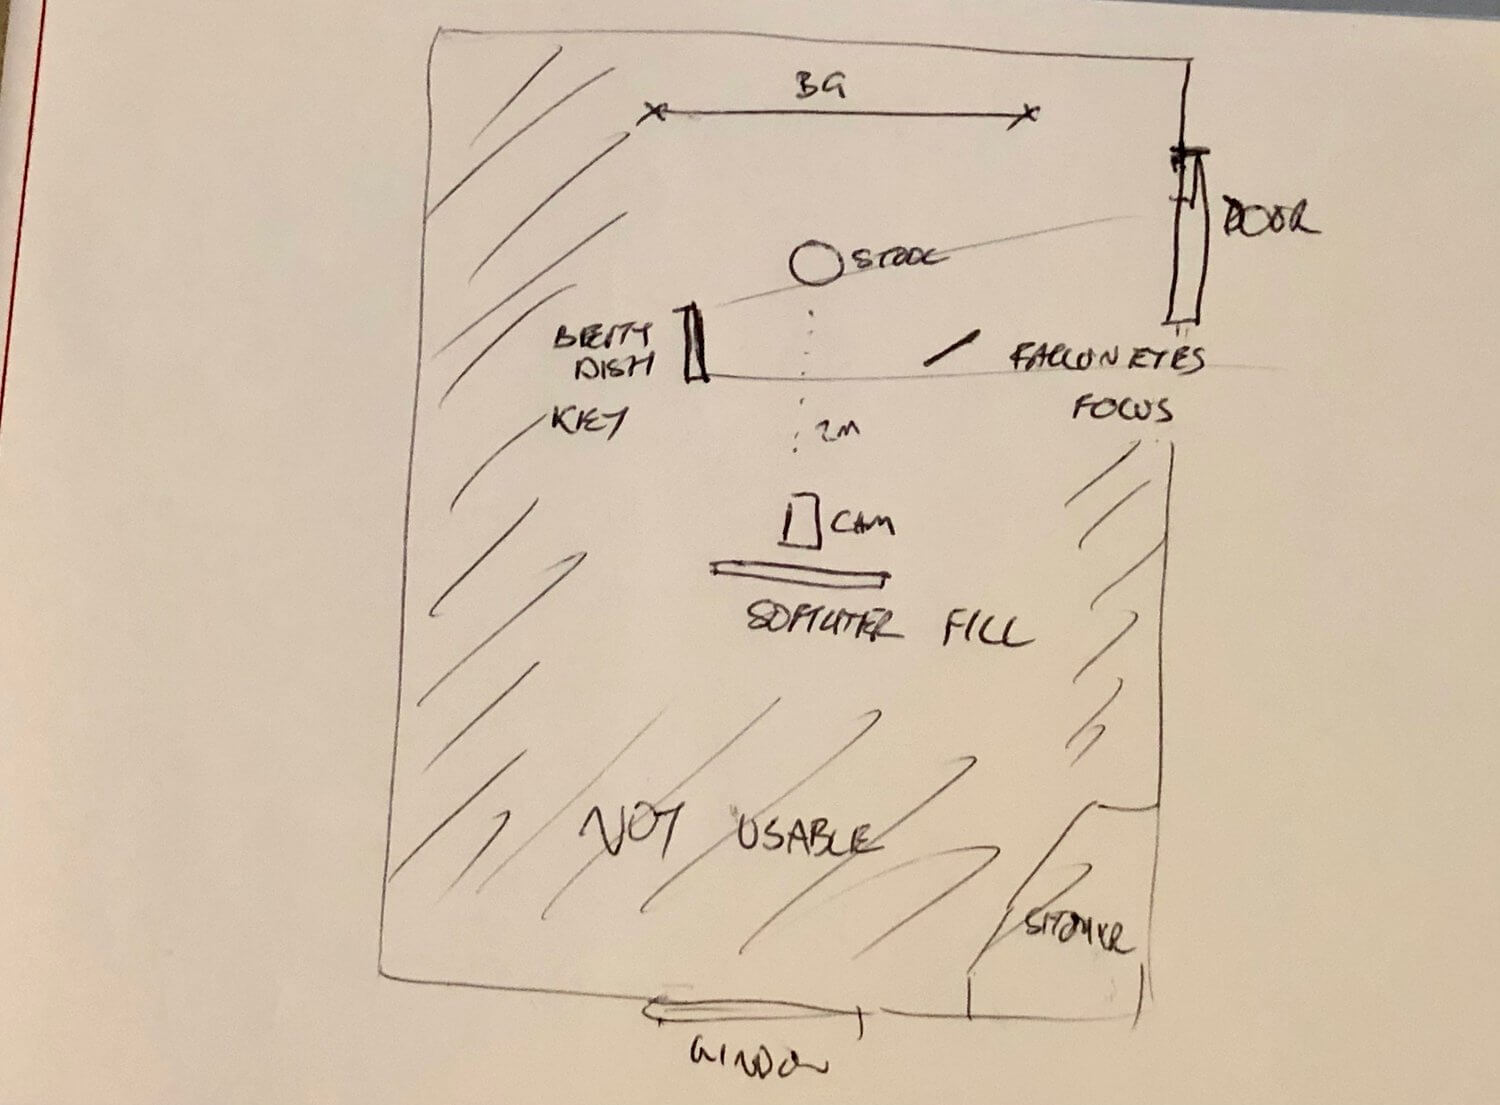
Set Plan
To match the mood that Clare selected I went for a fairly contrasty look with a beauty dish with grid. The grid was purely because of the small space where I wanted to control the background split. The shadows were filled with a 60’’ SoftLighter back as far as I could manage in the space. I added a LED panel by FalconEyes to the mix. This wasn’t for the photography lighting but focus and to make sure that the model’s iris’ were closed. A good tip for studio headshots is to have some controlled ambient light bright enough to close the pupils down in your subjects but not bright enough to get into your strobes. The strobes batteries where saved this way as I didn’t need to have the modeling light on at all.
The Kit
- Godox AD600 and AD600Pro strobes
- FalconEyes RX-24TDX light panel
- ProTek SoftLighter 60’’
- Bowens Beauty Dish with Grid
- Sony A7R3
- Sony 24-104 F4 G
- Capture One Pro
- TetherTools Cable
- MacBook Pro
- Lastolite collapsible background – White
- Tripod
The Shoot
Not a lot to tell here, set up and execution was done within the time frame. As we captured the images were tethered into Capture One Pro so Clare could check the images. The hair wasn’t allowed to be cut or dyed and only styled. This gave the looks more of a raw feel to them. I purposely shoot in black and white for a few reasons. One, the output we were looking at finalising in was black and white. I also tend to look at luminance when shooting and worry about colour later since we are in RAW. Doing so give me a much better sense of the lighting and removes the distraction of chroma, just like you do in Photoshop with helper layers.
The Post-Production
After the shoot, cull and Clare had selected what she thought would work best for the competition. I set to work on editing. My methodology when doing a set is to use Capture one to bring the set together exposure and colour wise. Sometimes experiment with looks on variations but ultimately drop into Photoshop to do clean up and grade. Before the shoot even took place, I was keen on using Infinite Black & White panel (at the time not launched) to try to bring the set together. As a note, I exported from Capture One in colour and didn’t use the inbuilt black & white function as that would have defeated IBWP before I even began.
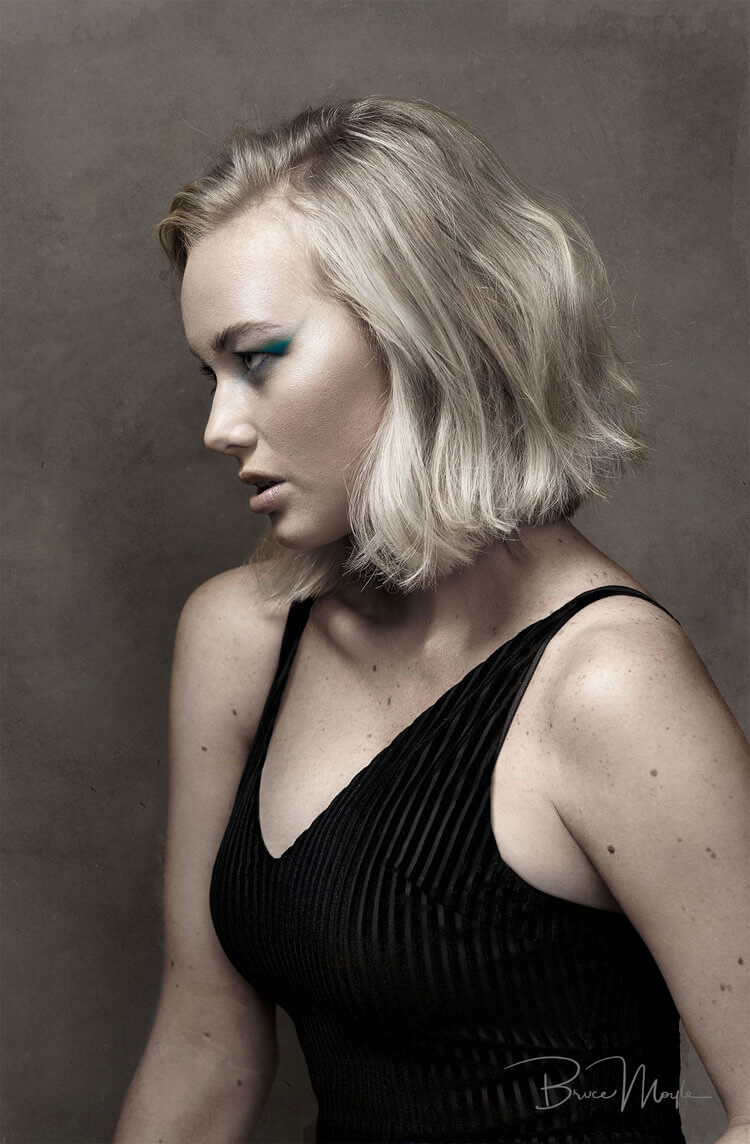
The first pass I went through to create a look was pure black & white using IBWP after skin and background clean up. I hit a problem. We have 6 images, 5 with blonde hair and one brunette. The brunette’s hair was laying on a black corset. While fine in a less contrasty look I was losing details when matching to the set. The second pass I muted the colour and brought in Infinite Color Panel to give me a tone to work with. Back and forward across the brunette and a blonde image to get a balance that worked. At this point, I layered in the background texture underneath and dodged and burned on a more global styled level over the top.
One of the tricks I used on the brunette to help pull the hair out more was subtle colour shifts. I pushed the hair slightly red and the corset more towards a blue to give colour contrast (something I couldn’t get away with in black & white).
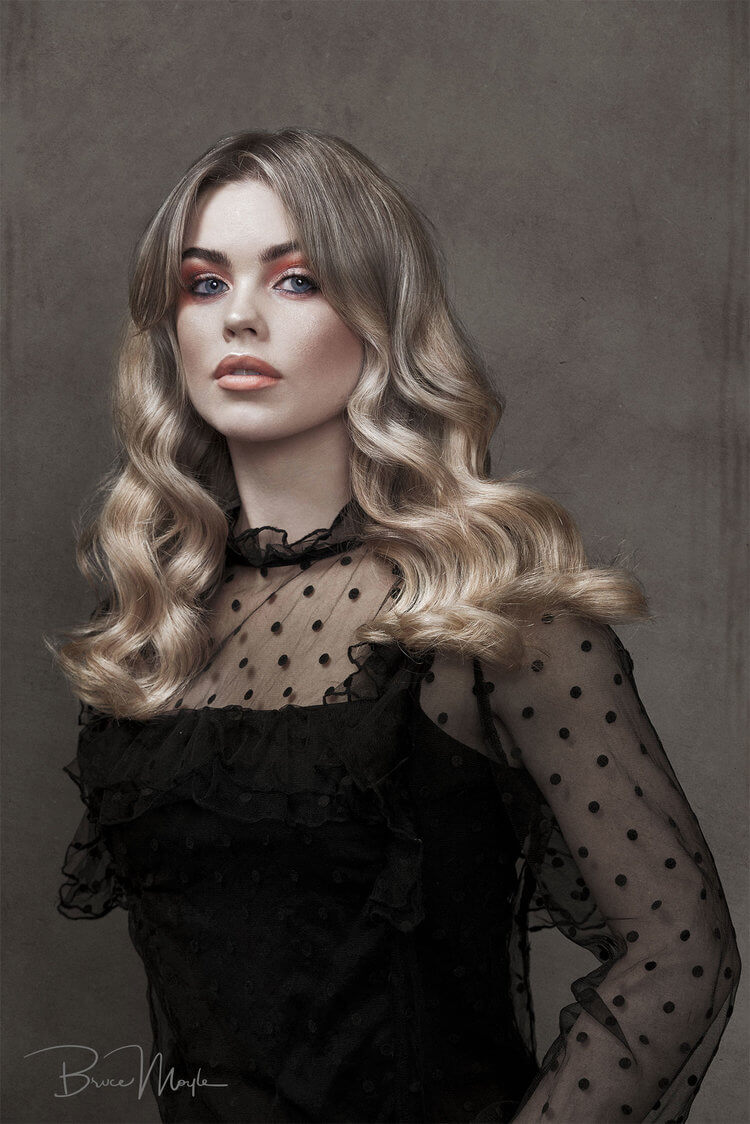
The added bonus of moving towards the muted look was that I could bring the makeup by Dylan Kirkhope back and make it sing which the original set would have lost impact.

An Extra Step
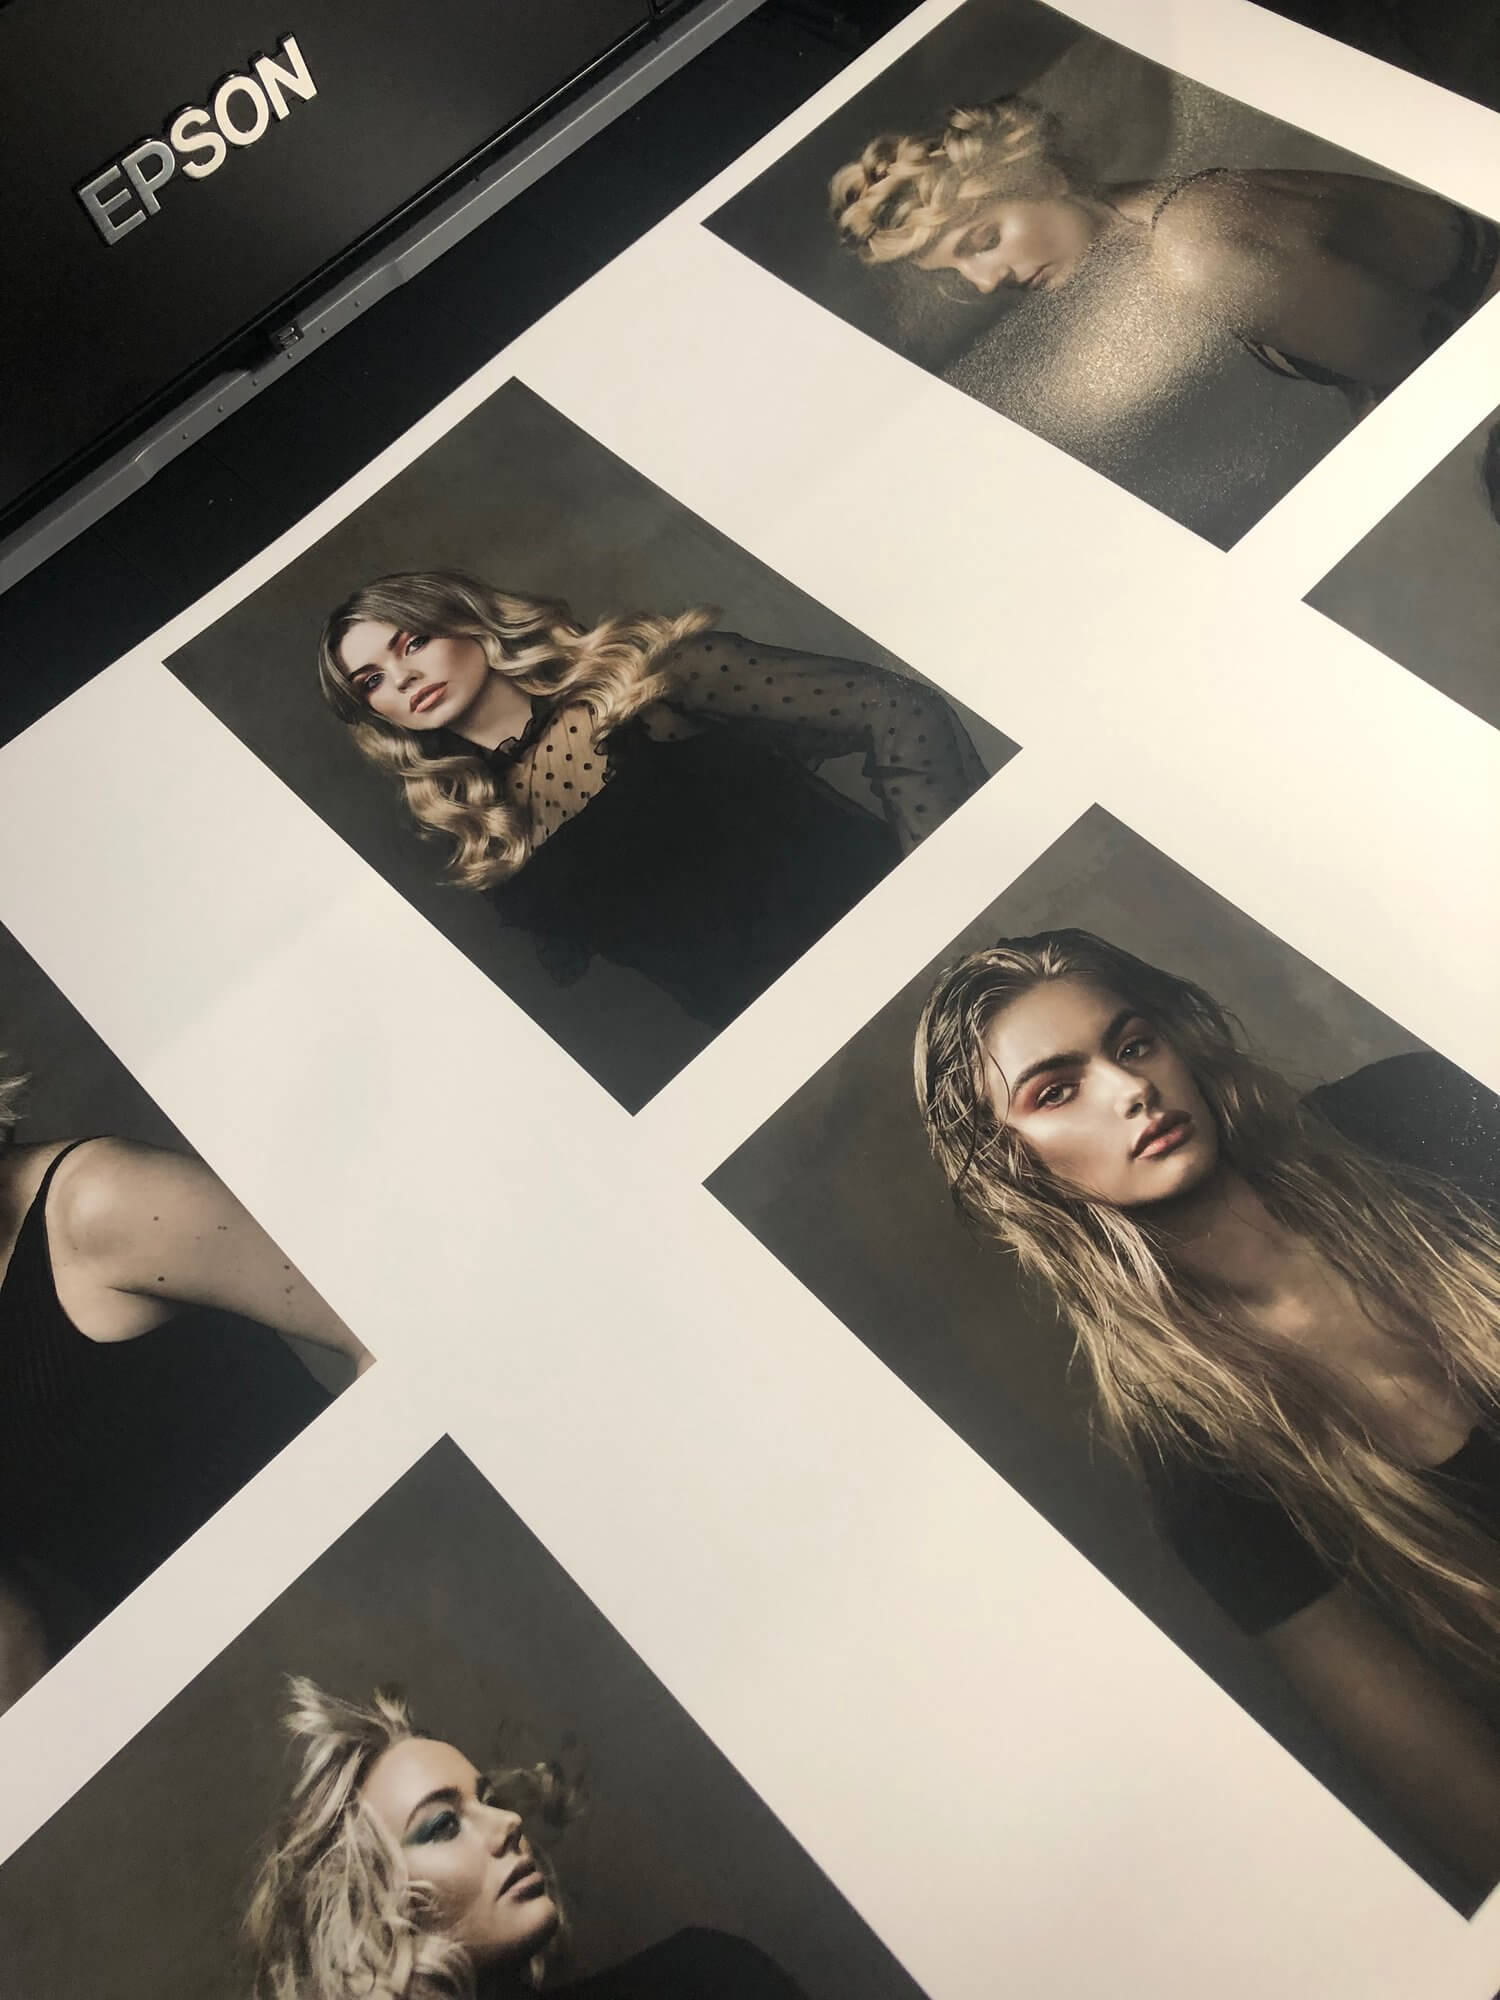
One of the things that I have incorporated into my workflow when possible is to print the proofs and finals. Printing is something that is missed a lot in today’s workflow but is super valuable to see things that you will totally miss on a screen. It gives you a better idea of the image as a whole. Now if the images are never going to make it to the physical world, or there isn’t budget to spare, then this is entirely optional step, but I guarantee if you have a fully calibrated workflow from camera to screen to printer/paper your appreciation and critical eye will go one step further than just looking at it on your screen/phone/pad. Also, it’s way cool to have physical versions of your images, even to hand to clients at the end of a job.
The Outcome
The shots submitted gained Clare finalist in the National Competition. Now we wait for April 28th when the winner will be announced.
_
Have you tried the panel yet? We’d love to see your creations! Get in touch on Instagram @infinitecolorpanel or the Facebook Infinite Color Panel group and show us your work.
If you haven’t tried the panel yet, get started here: https://infinite-tools.com/infinite-color-plugin/