
We got to have a chat with someone that I highly respect in the photo community, Greg Thomason! He’s a headshot photographer based in Franklin, Tennessee and has some of the most engaging headshots I’ve seen. I absolutely love the emotion behind every photo and I’ve always been curious about how he is able to get the best out of his subjects! It’s a true mark of a professional, along with his impeccable choice in lighting and post production!
Recently we worked with Greg on our Infinite Skin launch to see if he was able to get the results he needed and save time in the process. We were thrilled with what he was able to do while still retaining his signature look at the end!
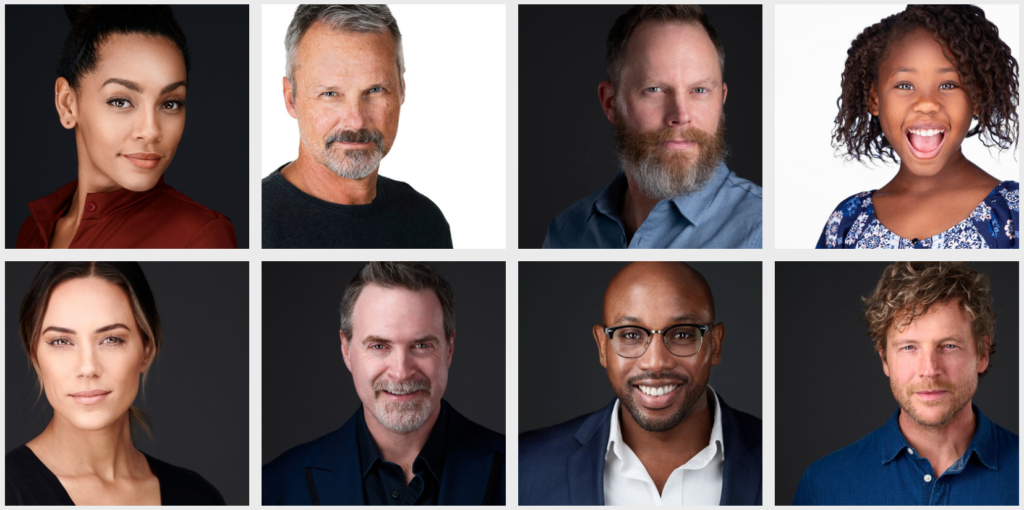
Here are a few images from Greg with either Infinite Unify and/or Infinite Skin used in the process.

Be sure to follow Greg by checking out his headshot and portrait site: https://www.gregthomason.com
You can also follow his Instagram account: https://www.instagram.com/gregthomason
If you’d like to see more examples of his lighting, check out: https://lightninglink.io/gregthomason/
__
One of the main reasons I come back to your work time and time again is your ability to convey a true connection with your subject. Could you paint a picture of how you’re able to bring out emotion in your client and also know when to hit the shutter to capture that?
Thanks Pratik! I feel the connection with my subject is the most important part of my photography. A well known portrait photog has famously said making a subject comfortable is not her job. For me, it is as much of my job as knowing where to put my lights. Although how much time I have to connect with them isn’t always in my control, bonding begins the second we are together. I like to get to know the person beyond name, work, etc… What makes the person happy, what are their hobbies, do they have kids, pets? If they want to know about me I share as well. I am asking the person to be vulnerable for me, I should do the same for them. As we talk, I’ll get the person where I want them and do any final light adjustments. Only then do I even start talking about the photography, and I emphasize that we have a delete button for photos we don’t like. This conversation continues throughout the photo session. I try to keep their mind off the camera. Often, I will get a reaction by suggesting a certain look. For example, “give me a look like you just got home from a long day at work (person frowns)… but as you walk through the door your dog runs to you and showers you with kisses.” I will start shooting when the person registers what I’ve said, and starts changing expressions. Somewhere in the three or more frames I make will be the keeper. This continues for the shoot’s duration.
Lighting is a common thread between various genres of photography. Do different subjects require different light setups, or do you find that you’re sticking to similar setups for each person? How do you determine what direction to go in?
My main genre is portraiture, and within that are two sub categories I shoot. I principally shoot commercial headshots and creative portraits. With both I have a couple basic lighting sets I start with, but I am not afraid to change. For example, for headshots the lighting is used to support the subject. I start with a flat light to flatter the person. With many headshots that’s as far as I need to go, lighting-wise. However, some folks, especially actors, want some depth or mystery is their headshots, so I’ll add shadows and maybe a kicker. Still, the subject remains the star, and the connection makes the headshot. The subject’s needs really determine any direction changes I make.
When I’m making portraits, the lighting often becomes a co-star. I start with my background or fill, and build from there. Given the time, I like to start simple and get a keeper in the can. Once that is done I can start having fun by adding lights, flags, atmosphere, etc… The client’s availability determines how much I can play with the looks we create. Direction changes are influenced by wardrobe, mood, and the amount of flexibility in our portrait end goals.
We love that Unify has been able to help you out in your workflow to correct skin tones and color casts. Where do you typically use it in your workflow and do you find most subjects have skin tone variations that are improved by evening them out?
Unify has really helped me as a portrait photographer. I am an ok re-toucher at best, so having tools that help my workflow is critical. My work doesn’t require re-touching to a high-end standard, but it does require the photos accurately reflect the person I photographed. Small shifts in skin tones are one of the easiest corrections for a photographer to overlook, but something the client will notice right away. It doesn’t matter if they spent a day in the sun, or get flushed in front of the camera, they trust I will fix it. l use Unify to subtly even out spots on around 30-40% of the photos I deliver to clients. I usually use Unify after my basic skin clean up, but before any contrast correction.
Do you have any other tips for photographers who are looking to cut down on their skin retouching before a shoot begins?
My advice for photographers that get people in front of their cameras is to think like a film photographer. Get as much right before the shoot, and in camera as possible. Give yourself, or your re-toucher, the best file possible to start with. That sounds like a canned answer, so how do I do that? For starters, I’ll suggest the subject get plenty of rest the night before, and stay hydrated. Living in the Nashville area, my advice is often ignored. When I’m shooting someone from out of town, the draw of the honkey tonks on Broadway is often too strong, and I have to reassure them I can clear their red eyes! Everyone knows what Photoshop is. For the day of the shoot, the most important step a client can do for their skin is to hire a professional makeup artist (MUA). I have a couple I consistently work with that know what I like, which is usually a more natural look. When budget or time precludes a MUA, I’ll make suggestions on makeup. Things to be aware of include not using base that has sunscreen as it may reflect the lights in strange ways. Also, unless you are sure about a powder (another reason to have a go-to MUA), I stay away from using it to cut down shine. My headshots are really close up, and the powder becomes obvious. The solution is to use a mattifying cream or blotting paper before shooting. Some skin issues, like blemishes, may look worse if you try to deal with it. Knowing that’s an easy fix, even for me, I just assure the client I can make it disappear.
With the resolution of even entry level cameras, skin clean up in post is critical regardless of the level of re-touching your workflow calls for. For me, any tool that helps me achieve my desired final look faster and more consistently, is a godsend. Unify, and the other Infinite Tools, have made my life easier.
– —
Written by Pratik Naik